Testing
Sep 22, 2025
Tune in to Live@7withHelen Thursday nights at 7pm on Facebook and YouTube for great deals, demos, sneak peeks and more.

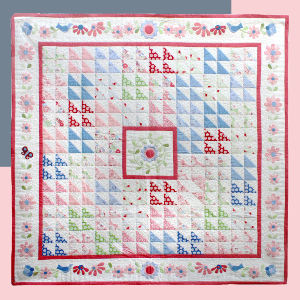
Do You Struggle With Wavy Borders On Your Quilt Tops?
Jul 17, 2021
By
wequiltva
0 comment(s)
We apologise that due to the closure of our previous blog platform, some images and links below are no longer active and cannot be restored or supplied.
Do you often end up with wavy borders on your quilt? Is your quilt often not square?
Here’s some hints and tips to get a perfectly flat border and quilt top - which your longarm quilter will love you for.
How to measure and attach borders to your quilt top to end up square!
It's not unusual for the four edges of an unfinished quilt top to all be slightly different lengths because the edges
of quilts are often stretched out of shape a bit during construction and pressing, or if you have many seams even the slightest difference in seam allowance can make a big difference.
If the quilt is skewed a bit and you measure the sides of the quilt to determine the border length, the quilt will be just be out of square as it was before borders were added. Never just cut a strip of fabric, start sewing at the top and trim off the leftover at the bottom.
If the border is too long, then the sides of the quilt will be puckered or wavy, and if the border is too short or tight, the middle of the quilt will bubble. If the border is not sewn evenly along the whole edge of the quilt, it will cause waviness in some places and tightness in others and just will not sit flat.
These instructions for measuring and sewing straight borders to a quilt can be used to add any type of border, plain or pieced/appliqued.
Straight sewn quilt borders, also called butted borders, are quick and easy to sew—that's probably why they are the most often used borders for quilts.
Borders are usually sewn to the two longest sides of the quilt first and then to the remaining two sides with the final two extending straight across the ends of the first borders.
The steps are:
1. Measure the quilt from top to bottom through the vertical centre.
I like to also measure at both side edges - add the three measurements together and divide by 3 to get the average. (a+b+c /3)
2. Cut two border strips that match the measurement exactly, using the average width you've just determined.
Borders made with crosswise grain strips can be more stretchy than lengthwise grain border strips, but either type is suitable. if you need to join strips to get the measurement, do this first, press seams open (or use a bias seam to reduce bulk) and then cut to size.
Extra Tip: Sometimes you will find that it's best to add top and bottom borders (or shorter borders) first to avoid the need for piecing those border strips.
Use the same method, but measure horizontally first and start at the Short sides. Determine which borders to sew first to make the best use of your fabric.
How to Sew the First Two Borders to the Quilt
1. Fold one of the borders in half crosswise to find its centre point, using your fingers to crease it slightly at that spot.
Do the same with your quilt to find the centre point. Finger press. (You can use a pin or marker to mark them also)
2. Place the border along the side of the quilt, right sides together and centre points matched. Pin through both layers at the match to keep fabrics from shifting.
If the quilt is quite large I would also mark the 1/4” and 3/4” marks along both the border and quilt top. Do this by
folding in half and then half again to crease these points.
3. Match and pin the bottom end of the border to the bottom edge of the quilt with raw edges even, then match and pin all of your crease marks until you reach the other end of the border pinned to the quilt.
4. Add extra pins at close intervals in between your quarters and ease in any fullness to coax the two lengths
to match. Raw edges should be aligned along the quilt's entire side.
5. Sew the border to the quilt with a 1/4 inch seam allowance, removing pins as you approach them to avoid bending pins and breaking needles. If you have extra fullness, sew with the longest piece next to the feed dogs and this will really help to ease it in without puckers.
6. Press the seam allowance towards the border.
7. Repeat for your opposite border.
Sew Remaining Two Borders to the Quilt
1. Measure the quilt from side-to-side through its horizontal midpoint and top and bottom edges, including the width of the first borders. Find the average and cut or piece two borders that length.
2. Fold a border in half (and quarters if large) crosswise and crease. Pin again matching all of your crease marks.
3. Continue as you did with the previous borders.
If you are adding more borders to your quilt repeat the process above.
Using this method will give you the best chance of a perfectly square flat quilt top - even if your piecing was notperfect.
Go forth and make square flat quilts!
happy quilting
hugs from Helen