Testing
Sep 22, 2025
Tune in to Live@7withHelen Thursday nights at 7pm on Facebook and YouTube for great deals, demos, sneak peeks and more.

The Leah Day Project
Jul 17, 2021
By
wequiltva
2 comment(s)
We apologise that due to the closure of our previous blog platform, some images and links below are no longer active and cannot be restored or supplied.
Whilst testing my blocks for my latest Block of the Month Project ‘In The Good Old Days’, I decided to use one right here to send to Leah and see what she did with it!
and here are the results! Pop over to her blog to see what and why!
so here’s a quick tute on how I made it..
Make four A/B and eight B/C half square triangle units.
Place the squares right sides together with all edges even. Use a Clearly Perfect Angles tool to eliminate the need to mark diagonal lines. Check out this video for help on the tool – it is brilliant and will give you accurate units every time.
So to make half square triangle units you are going to line the point up with that grey line and stitch 1/4” either side of what would be a centre line. Chain piece all the units through and then turn them and stitch down the other side.
Then use scissors or your rotary cutter and ruler to cut them apart down the center of the two stitch lines (point to point)
Press them all open. You will have 4 corner blocks and 8 blocks which go on the 4 sides of your finished block.
NOw take your D squares, right sides together and make four half square triangles as before.
You are then going to use your ruler and cutter and cut them in half point to point. And discad the four top halves (use them for something else one day)
Next we find the four C triangles (we cut our squares in half earlier). Place right sides together and stitch along the long edge- you need to take care not to stretch this bias edge.
Press open carefully.
Now lay all your units into rows and stitch together matching all points. note: if you press the seams in each row in opposite directions (ie top row to left, 2nd row to right) then they will butt up nicely and make for easier seam matching.
To complete my block I added corners to put it on point (note: this was testing my measurements for my BOM quilt side and corner set triangles)
Cut two squares light fabric 5 3/4”
Cross cut once to make four triangles
Cut one strip red fabric 1 1/2” x wof
Lay the triangles right sides together along the long cut edge on the red fabric strip. Stitch taking care not to stretch the bias edge. Leave space in between each one for turning and cutting.
Press red strip outwards and use a ruler and cutter to trim the red strip at an angle in line with the edge.
Attach a triangle to opposite sides of your block. press open. Attach remaining two and press out. Trim your block and then see what Leah does with her amazing quilting!
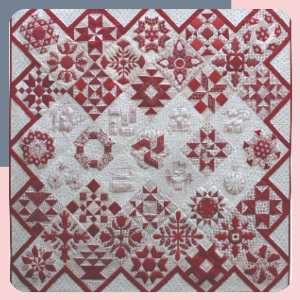
This is where and how I used my block! can you spot it?
hugs for today
and thanks Leah for the invite to work with you.
Helen
'
2 Item(s)